


Table of contents
360 Quick Sign Support Overview
eliminate the hassle of manually signing cheques for ever little business expense
With 360 Quick Sign, streamline Accounts Payable processing by automating signature printing on cheques in Microsoft Dynamics 365 Business Central.
- Speed up Accounts Payable Processing
- Configure signatures and dollar thresholds per company
- Automate one or both signatures
Prerequisites
-
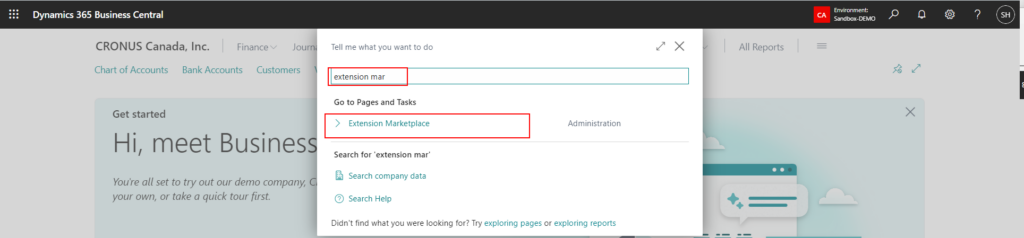
Launch Extension Marketplace from Extension Management
-
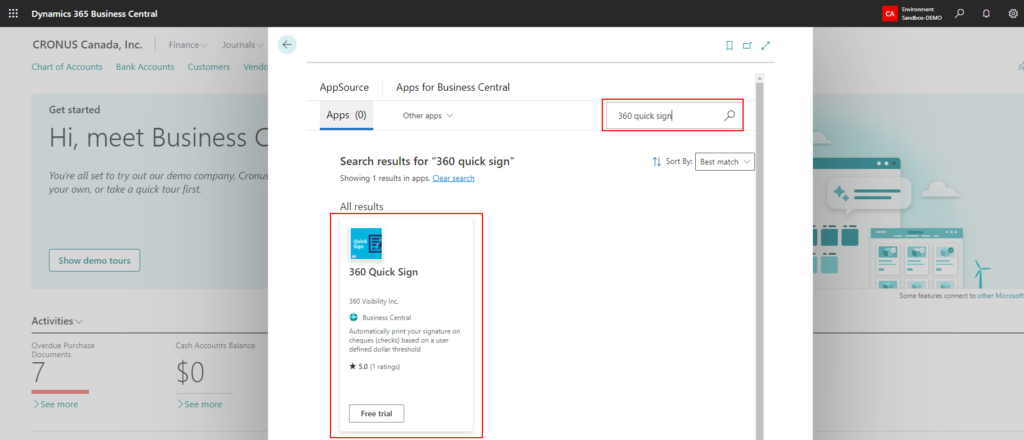
Search for 360 Visibility Apps in Extension Marketplace and select 360 Quick Sign.
-
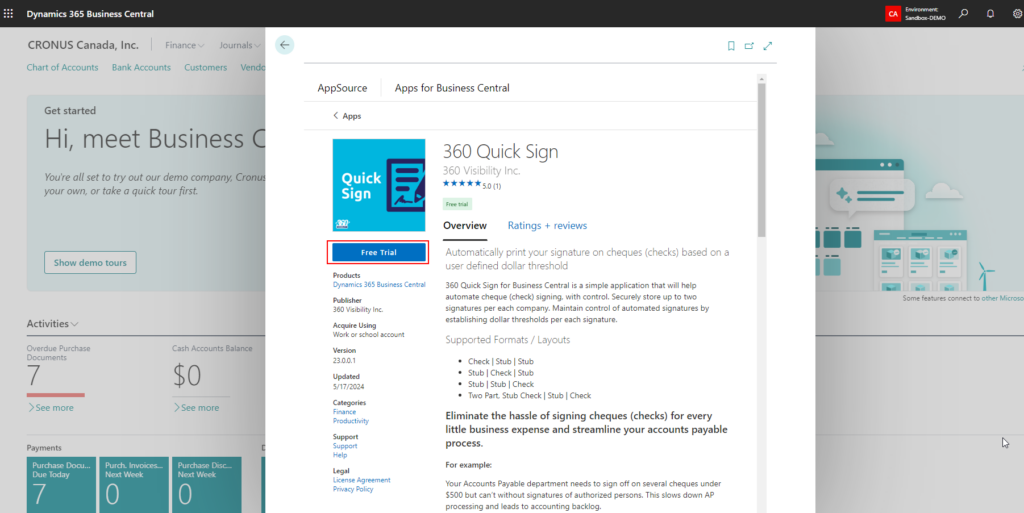
In the Extension Marketplace app page, click on FREE TRIAL.
-
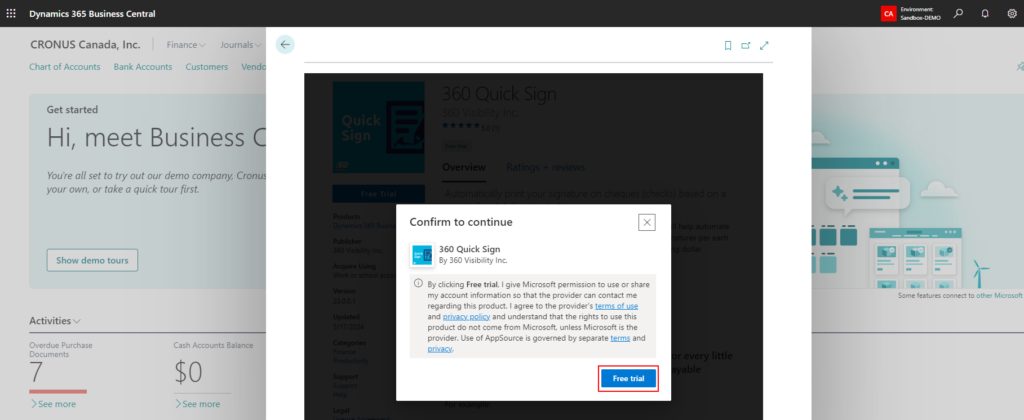
Click on “Free Trial” to confirm and continue to start App installation in Business Central.
-
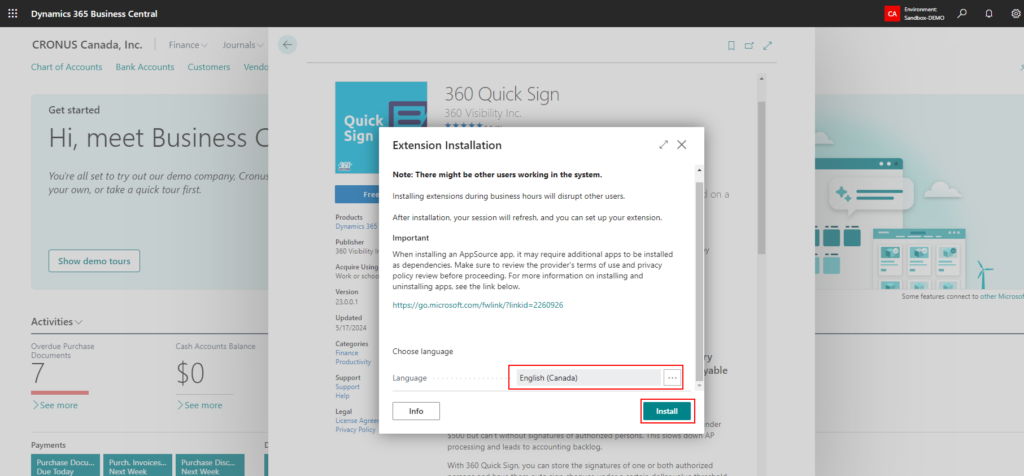
Select the Language and click on “Install” to continue the installation.
-
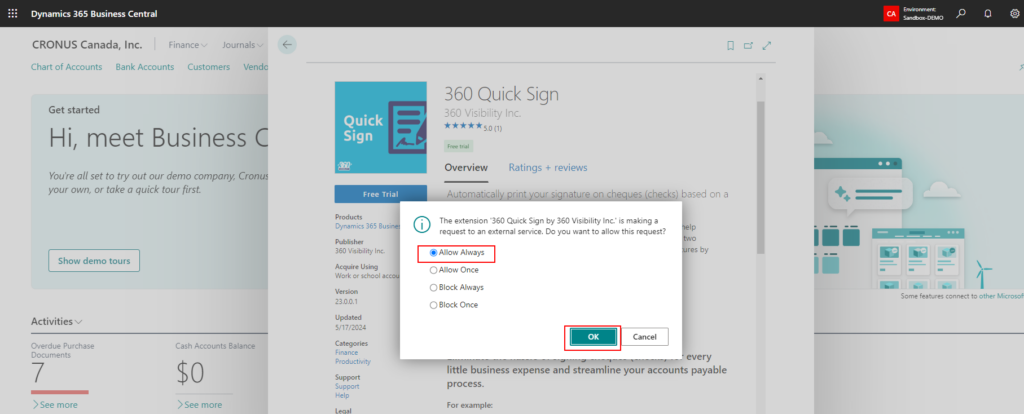
Select “Allow Always” and click on OK to continue.
-
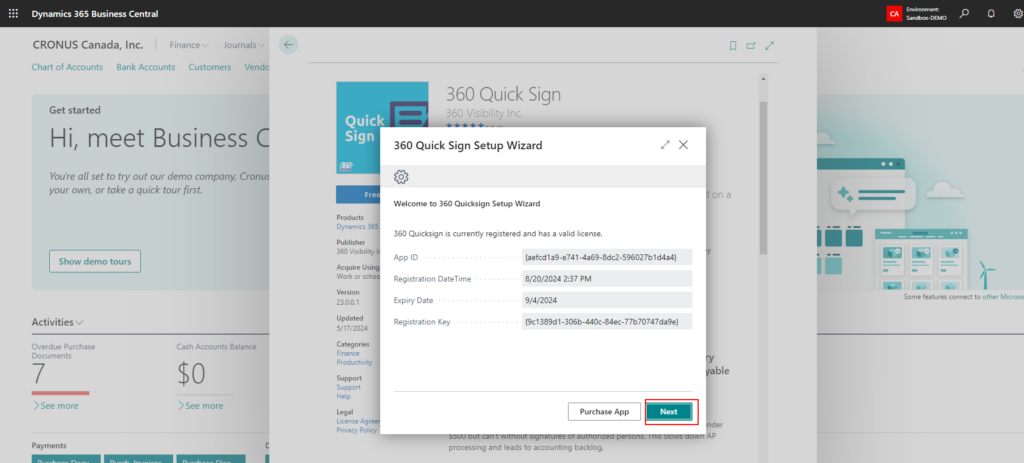
Click “Next” to use the Trial. Or “Purchase” to start the subscription.
-
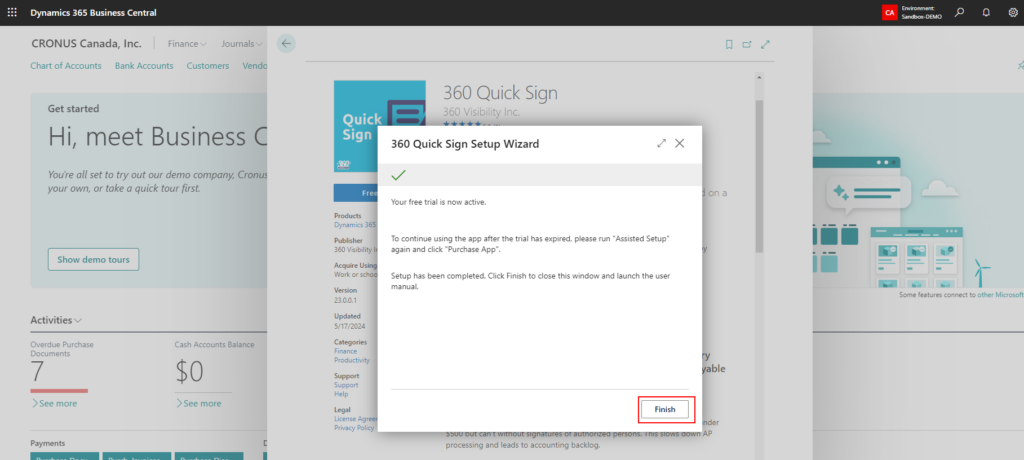
Click “Finish” to complete the installation.
Setup and Registration
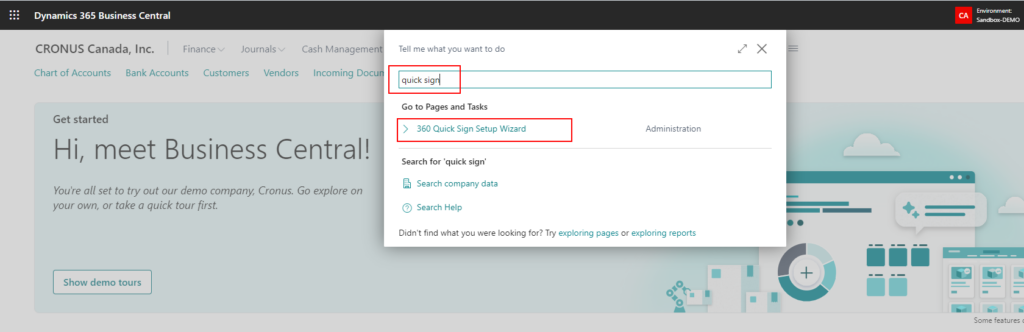
- Using the Search function (press ALT + Q to activate), search for “Quick sign” and click on “360 Quick Sign Setup Wizard”
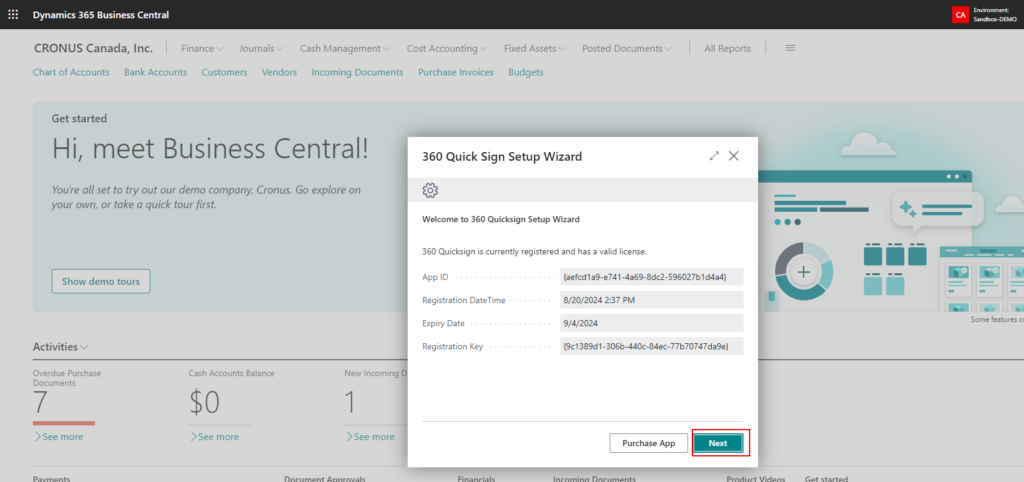
- Click Next to continue with Trial or click on “Purchase App” to go to registration site”. This will direct you to the 360 Customer Portal where you can complete the registration process and purchase the subscription.
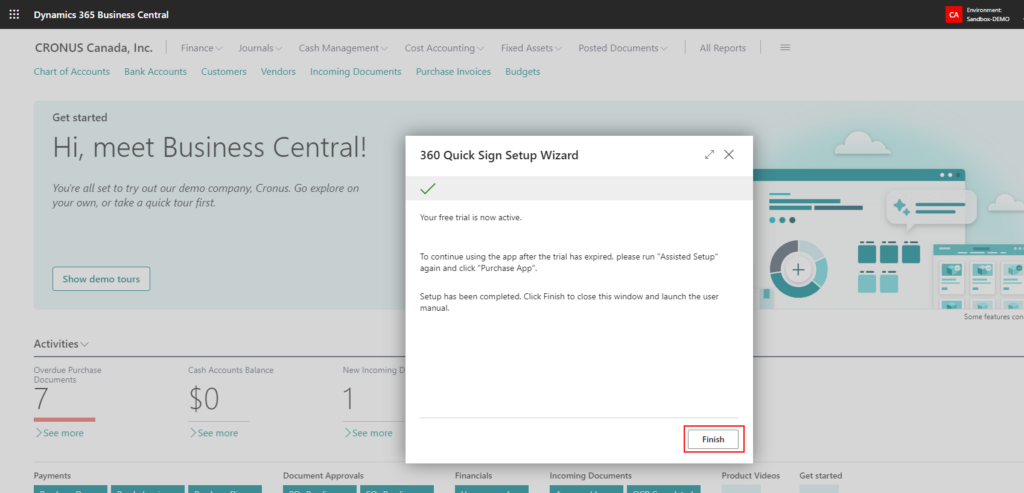
- Click on Finish to complete the Trial activation.
Configuration
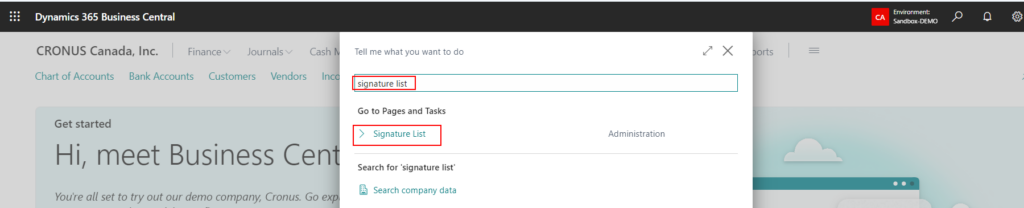
- Go to search and type “signature list” to open the Signature List setup page.
- Click “New” to add a new signature.
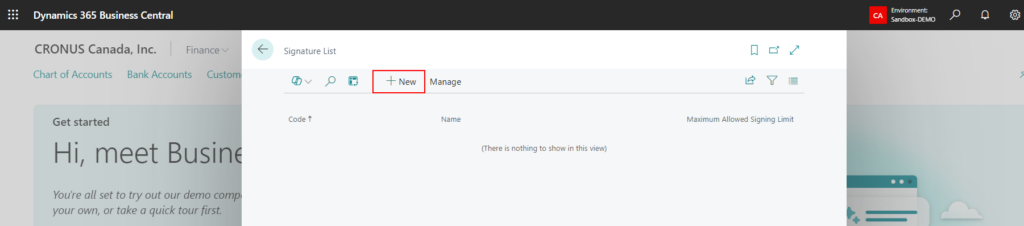
- Enter the following information to create the signatures. Repeat this step to add the second signature.
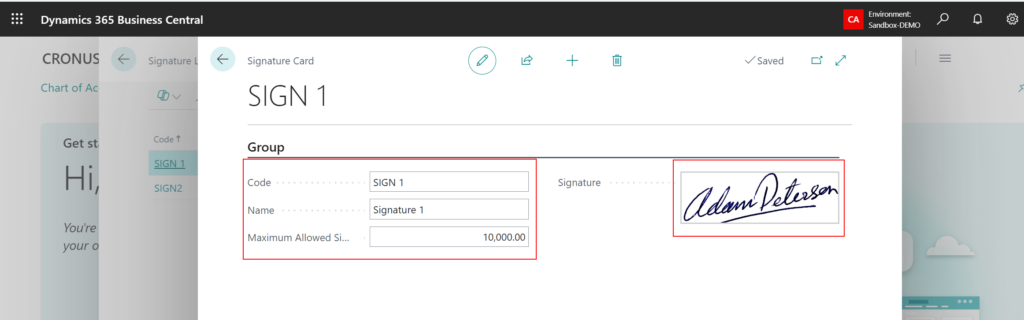
- Code
- Name
- Maximum Allowed Signing Limit:
*Defines the maximum amount for automatic signature printing. If the cheque amount exceeds this limit, the signature will not be printed.
- Signature Image.
To insert the signature image, click the “+” button and select the file, or simply drag and drop it.
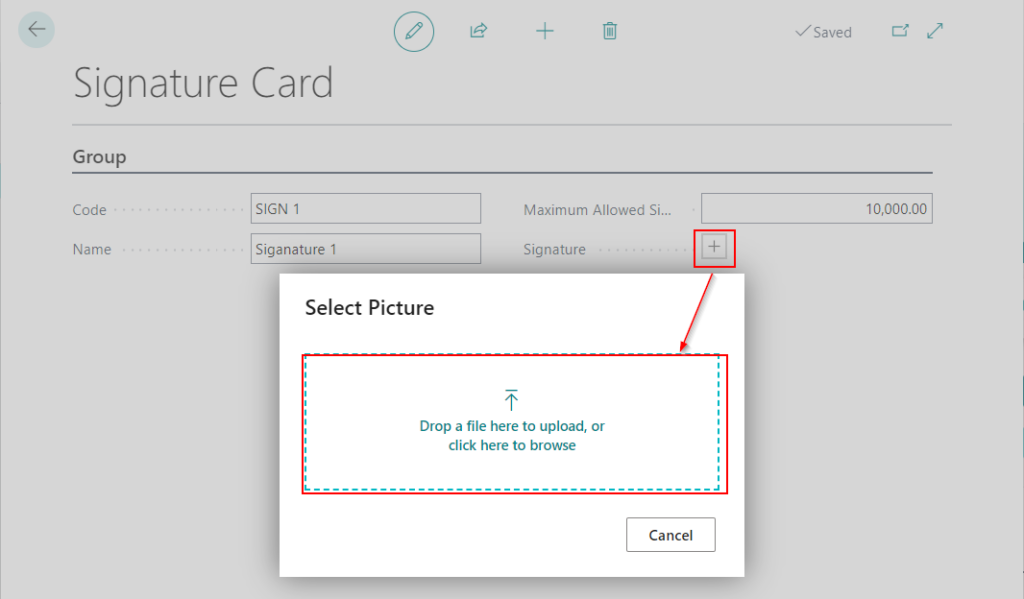
The signature image size should be as follows:
Signature 1 Width 2.75in x Height 0.55in
Signature 2 Width 2.75in x Height 0.325in
- Go to Settings-> Company Information.
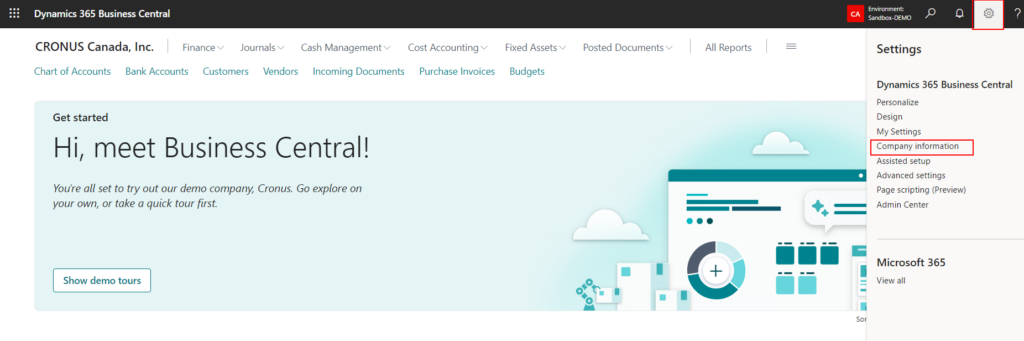
- Scroll down to the Payment fast tab and locate the 360 Quick Sign setup fields.
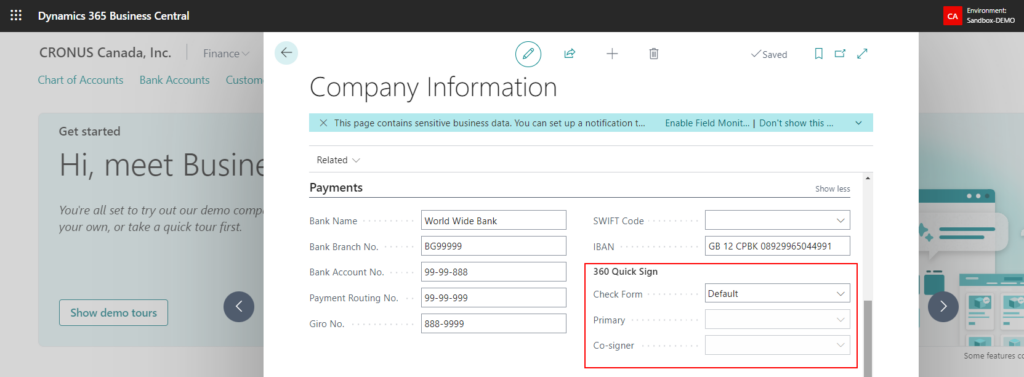
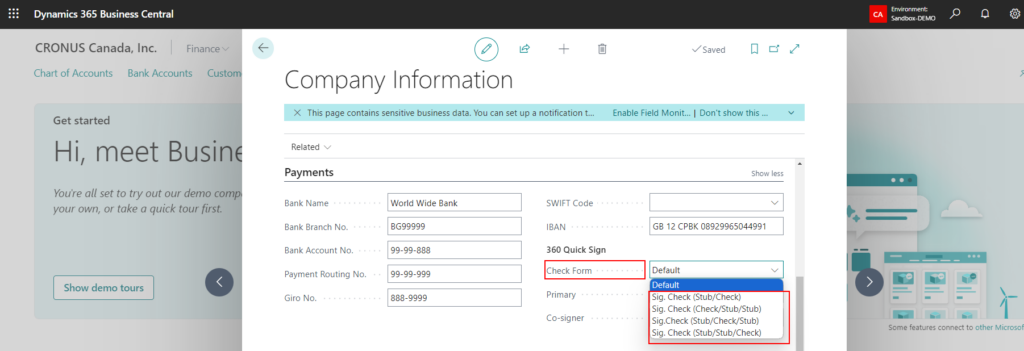
- Change the Check (Cheque) Form. Select the required layout.
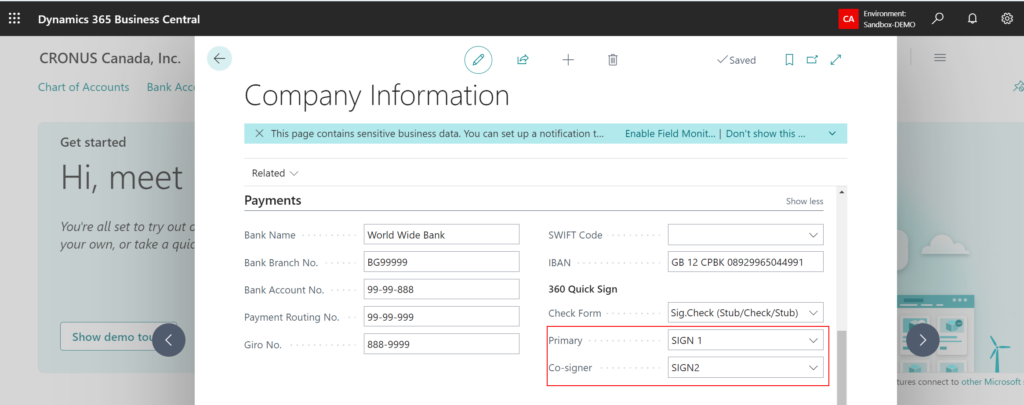
- Select the signatories on the Primary and the Co-signer fields
Printing Cheques
- Navigate to Payment Journals by going to Cash Management then Payment Journals or using the Search (ALT +Q).


- Enter a payment as per normal and print the cheques.

-
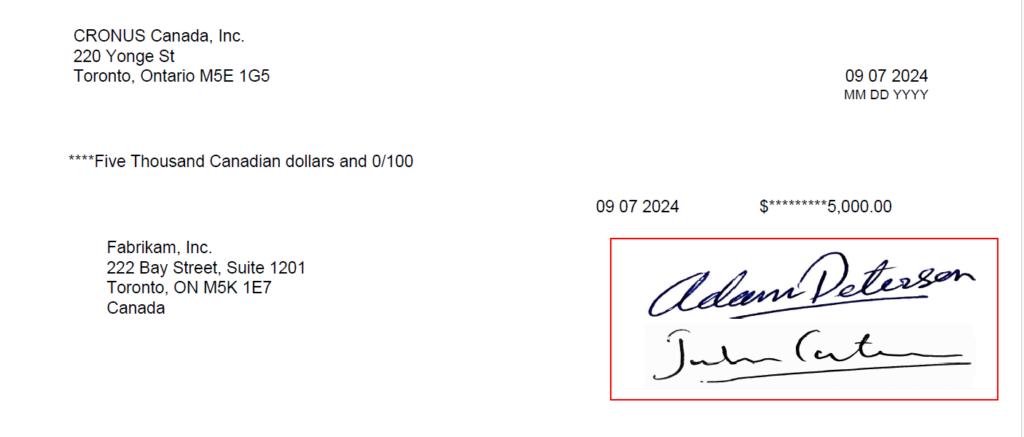
The system will automatically print the signatures on cheques based on the user defined dollar threshold.
Example.
- Cheque Amount is $5,000. Both signatures are printed.
- Cheque Amount is $15,000. Only one signature is printed.
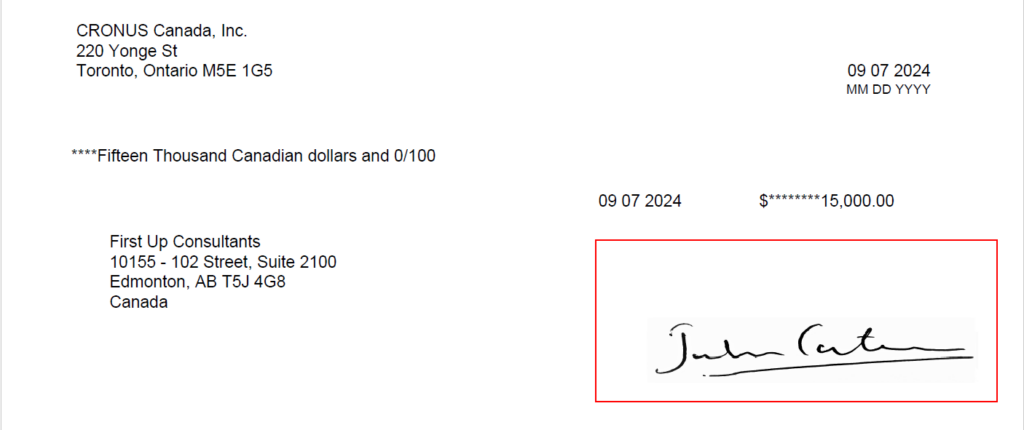
- Cheque Amount is $55,000. No signatures are printed.

- Cheque Amount is $5,000. Both signatures are printed.